The Google 3D Warehouse is a publicly accessible repository of models generated by users of Google's 3D modeling software, SketchUp. The finest of these models have been added to Google Earth, where you can go 'see' those buildings virtually on the globe. The Google 3D Warehouse is therefore a source of many digital models of buildings. The contents are not limited to existing buildings, though, as users have also contributed all kinds of models, ranging from historic buildings that no longer exist to entirely fictional creations like sci-fi spaceships and weapons from Middle Earth. Pretty much anything can be modeled in Google SketchUp and then stored at the Google 3D Warehouse.
To explore the capabilities of the Makerbot, I decided to try to print a scaled-down model of the CN Tower. It would be an example of going from Google SketchUp model to a physical model, and the tower design would demonstrate the Makerbot's ability to print a tall, thin tower. I found a model with a search on Google's 3D Warehouse, and opened it in SketchUp.
It was designed according to the actual dimensions of the CN Tower, but another benefit of digital models is that they are easily scalable and the proportions can be kept constrained. SketchUp features a scale tool for easily altering the size of a model. I couldn't get Google SketchUp to go straight from CN Tower-size to Makerbot-size, but I got there in multiple steps of scaling the model. Eventually, I got it down to around 11cm in height. I cut the model into two parts, each of which would fit in the build space of the Makerbot.
To print on a Makerbot, a model has to go through a few steps to create the code that the printer will use to make the object. The file must be in .STL (stereolithography) format. That file type has all the surface geometry data of an object. Google SketchUp doesn't export that type natively, but there is an add-on that accomplishes that task. After installing that, I was able to easily export the two models each as STL files.
Another program called Skeinforge is used to create a gcode file that the Makerbot uses to print. Skeinforge runs in Python, and has many variables to customize the print job for your machine. It also can add a raft to the bottom of the object. The raft is a base layer of plastic that the object is printed on for a uniform build surface. It also adds stability in printing as the raft sticks to the build platform.
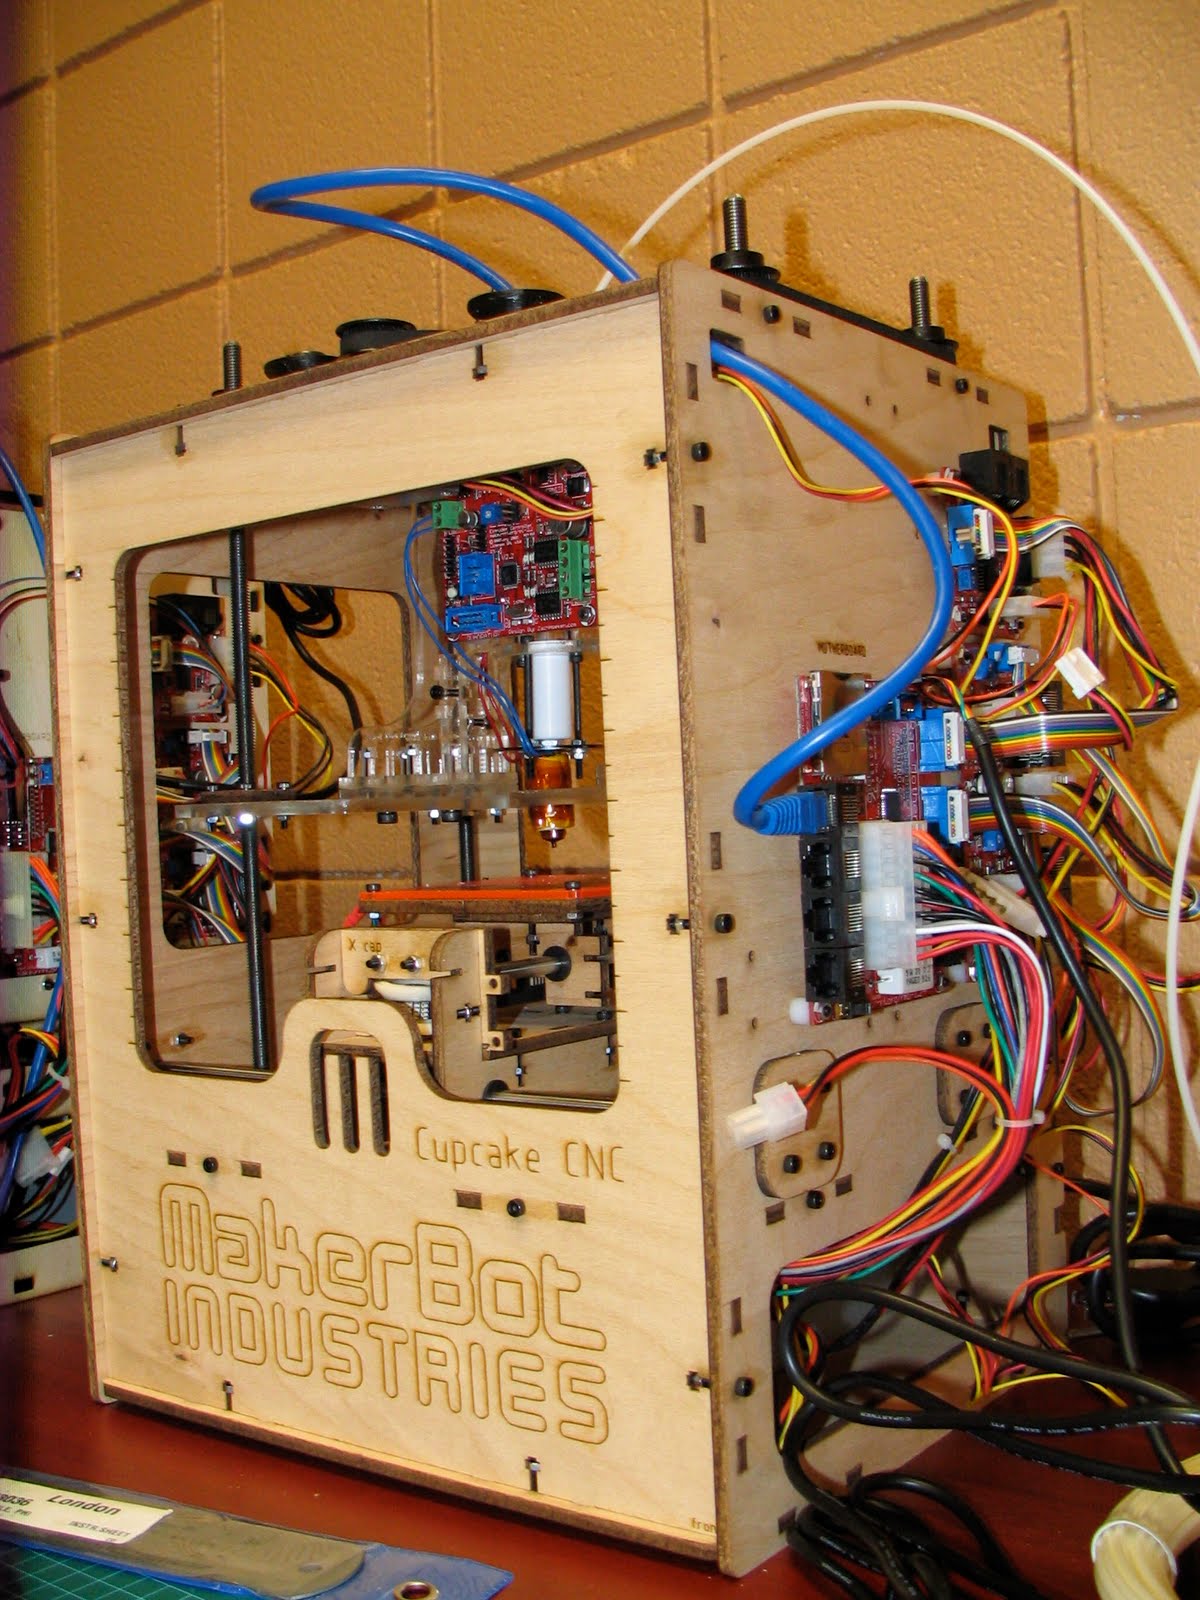
The gcode generated by Skeinforge is opened in ReplicatorG. This is the actual program that interfaces with the Makerbot. A control panel can be opened in ReplicatorG to control the Makerbot manually. The build platform and extruder can be moved. The extruder can be heated to a particular temperature, and the feed rate of the plastic filament can be run and tested. This is how you warm up the Makerbot to ensure it will print your object properly. You can also see the gcode created and scroll through the many steps that the printer will take to print your object. A simulation of the build can be run, and there's a build button for when you're ready to print an object.
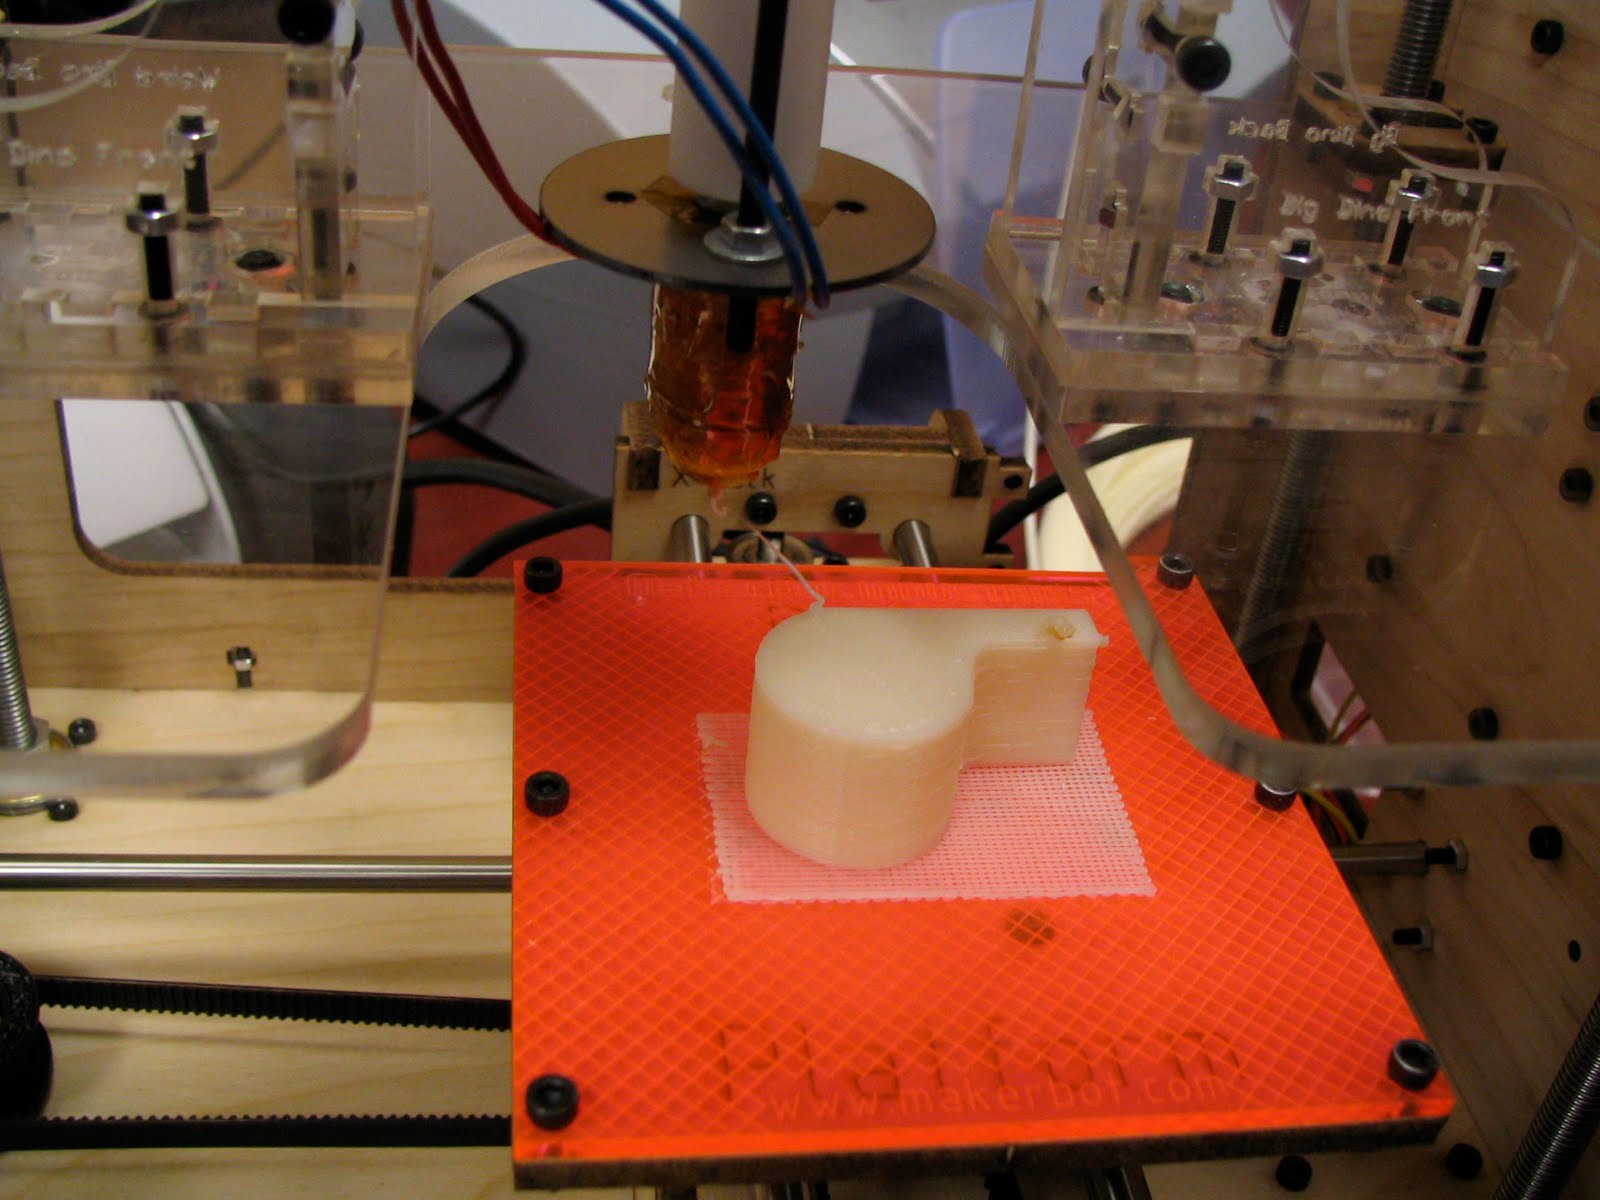
 The two objects printed and I glued them together to form my scale model of the CN Tower. The towers printed better than I expected. The base formed fairly well, and the observation deck looks good. The top tower above the observation deck is very thin, and this formed but with quite a bit of wobbling due to the heat from the extruder being so near it as it built each new small level -- the printed parts never really cooled and didn't form properly. Still, it looks like a small CN Tower.
 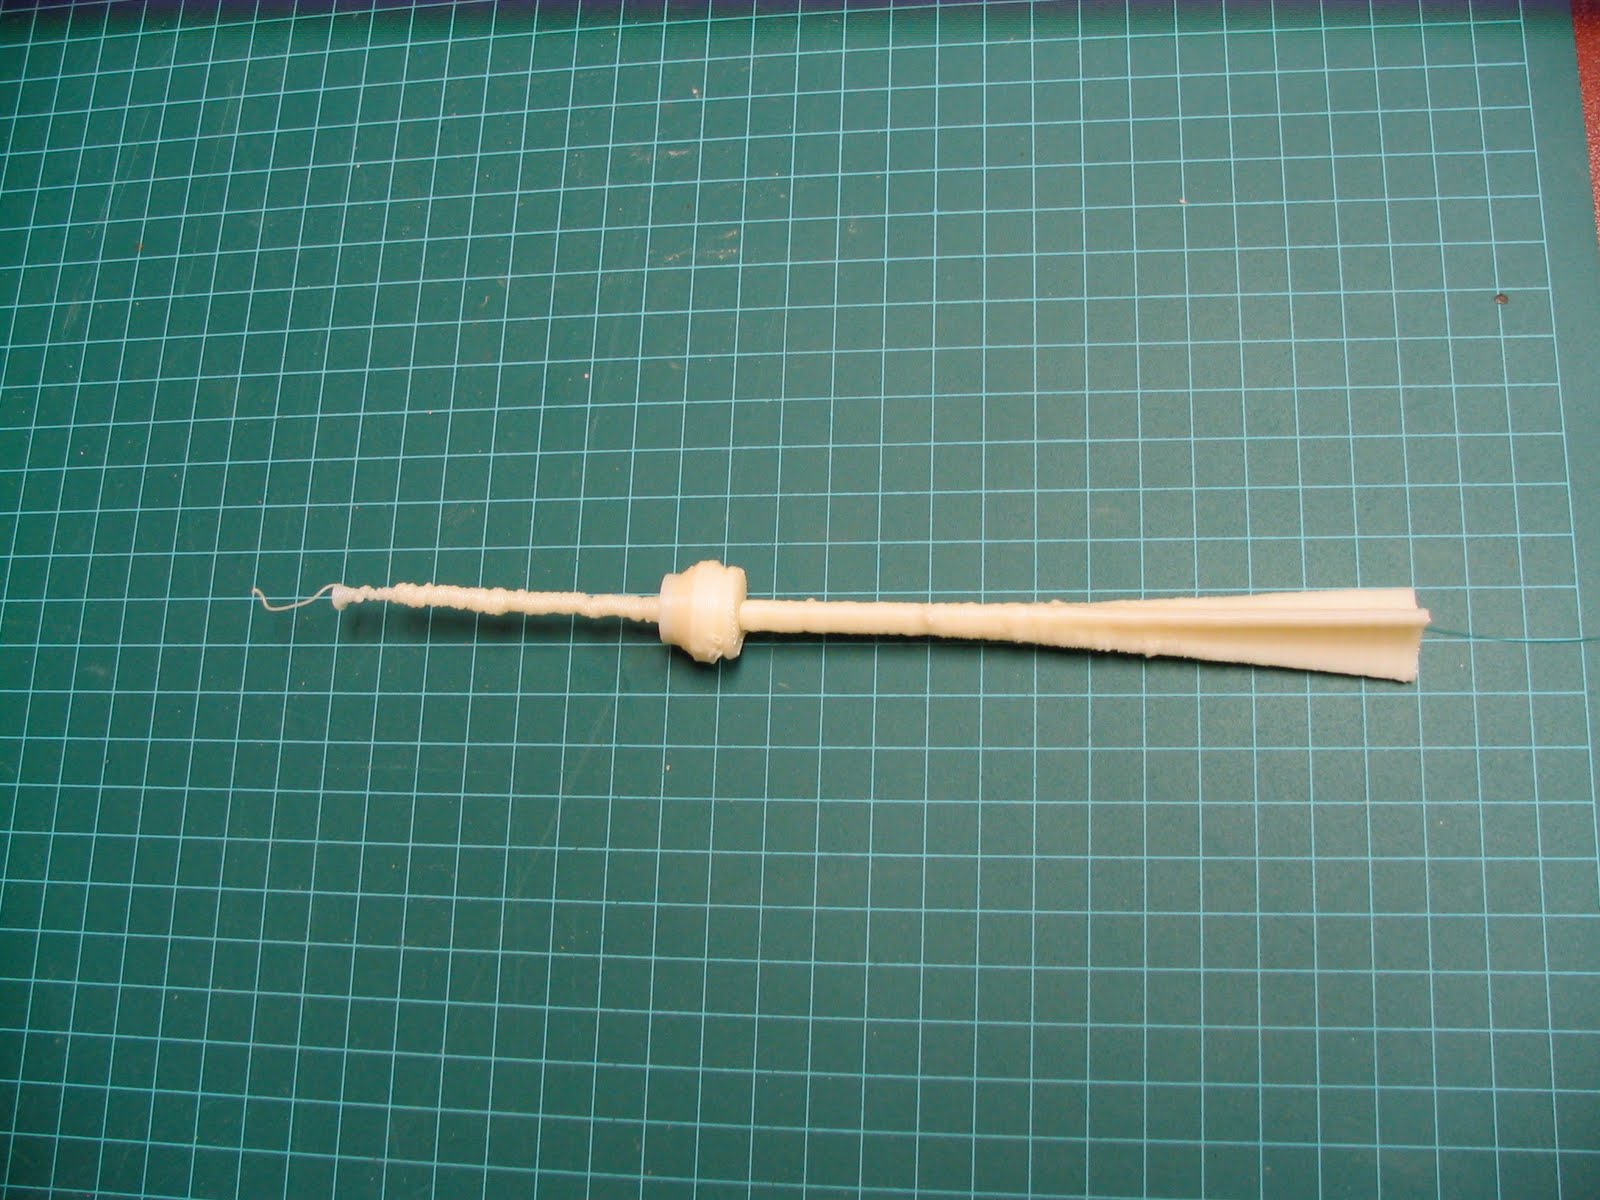 I posted the files to Thingiverse in case anyone else wants to try it. There, others can change the files to suit their needs, or make changes to try make a better print. It's been downloaded a number of times, but I don't know if anyone else has tried printing it. A couple of users liked it, though.
User generated repositories of 3D models are great resources for fabrication. Many models are out there at sites like Thingiverse or Google's 3D Warehouse. What types of things can humanities scholars contribute to these sites? Making data available can allow others to experiment with their models, and play with physical objects related to their research.
As cultural and heritage institutions have directed resources toward the digitization of their collections, perhaps we can try to re-materialize elements of those collections locally for applied research and study. Digitization has often been in the form of digital photographs of objects, but 3D scanning technologies and virtual modeling software has become much more accessible. Hopefully digitization in museums, for instance, will move toward three dimensional digitization, as those forms will inherently record more physical information about objects. Open access to that data would allow researchers to experiment with those forms in a variety of ways, both in virtual and re-materialized physical forms.