While researching historical topics, I love it when I come across plans for how things work, or explanations of how to make things. Old patents, instruction sheets, blue prints, and articles in magazines like Popular Mechanics. Google has made some of these sources more readily available through their services.
When the back catalogue of Popular Science became available via Google, I immediately began to look for old issues that explained magic tricks. An issue in 1944 had a small section on magic tricks that one could make, and the plans included diagrams with measurements. In particular, one puzzle toy stood out -- a cone that seemed to roll uphill.
The object was simple enough, and the details explicit enough, that it seemed to be something that would make a good test with the Makerbot. How easily would it be to take the full plans for something, and materialize them into a physical thing?
I turned to Google SketchUp to build virtual designs of the object. In order to print one, I had to take the limits of the Makerbot into mind. The build platform is only roughly 4x4x6 inches, and the ramp was larger than that. The geometry of the whole thing also seemed like too much to print, so I set about breaking the piece up into the most basic components. Due to the symmetry of the piece, only three parts were necessary: a cone, and two sides of the ramp.
For me, one of the strengths of Google SketchUp is being able to input actual measurements, and have the program adjust a component being made to that size. I had to convert the imperial measurements to metric, but was then able to draw each of the parts, and form them into objects in SketchUp. I exported the files as STL format, and set began to print them.
The first problem I ran into was that the length of the ramp portions were at the diagonal limits of the build platform. Building a raft for it in Skeinforge covered the entire build platform, and the extruder head ran into the bolts holding it together. It made a pretty bad sound -- not what you want to hear while printing. Adjustments to the Skeinforge settings fit it all onto the platform, but the next issue was warping.
ABS shrinks about 2% from when it is hot for extrusion to a cooled state. As the layers build, each shrinking 2%, this causes the piece to bend upwards from the edges. The thin bases popped off a few times due to warping. The company behind the Makerbot released a heated build platform that appears to eliminate the warping.
Eventually, I was able to get all six pieces printed, and was surprised at the consistency of the warping. I stuck them all together -- the two cones with double-sided tape, and some clay was nearby for the ramp. I set the cone on, and it rolled up the hill. Success!! The files are posted at Thingiverse, along with a photo.
While neat to look at, I was mostly wondering about what other sorts of plans could be used as the raw data for objects. Plans for things exist in a variety of sources, and it is getting easier to both digitize that data, and to materialize it in some form.
Tuesday, September 28, 2010
Tuesday, May 25, 2010
From Bits to Atoms
One of the advantages of 3D printers like the Makerbot is that it allows you to go from virtual, computer-generated models to real, physical objects. With some initial success in printing out an object, I was curious what other virtual forms I could print. Thingiverse is an excellent repository or user-generated content specifically for making things. Google also has a 3D Warehouse of virtual things.
The Google 3D Warehouse is a publicly accessible repository of models generated by users of Google's 3D modeling software, SketchUp. The finest of these models have been added to Google Earth, where you can go 'see' those buildings virtually on the globe. The Google 3D Warehouse is therefore a source of many digital models of buildings. The contents are not limited to existing buildings, though, as users have also contributed all kinds of models, ranging from historic buildings that no longer exist to entirely fictional creations like sci-fi spaceships and weapons from Middle Earth. Pretty much anything can be modeled in Google SketchUp and then stored at the Google 3D Warehouse.
To explore the capabilities of the Makerbot, I decided to try to print a scaled-down model of the CN Tower. It would be an example of going from Google SketchUp model to a physical model, and the tower design would demonstrate the Makerbot's ability to print a tall, thin tower. I found a model with a search on Google's 3D Warehouse, and opened it in SketchUp.
It was designed according to the actual dimensions of the CN Tower, but another benefit of digital models is that they are easily scalable and the proportions can be kept constrained. SketchUp features a scale tool for easily altering the size of a model. I couldn't get Google SketchUp to go straight from CN Tower-size to Makerbot-size, but I got there in multiple steps of scaling the model. Eventually, I got it down to around 11cm in height. I cut the model into two parts, each of which would fit in the build space of the Makerbot.
To print on a Makerbot, a model has to go through a few steps to create the code that the printer will use to make the object. The file must be in .STL (stereolithography) format. That file type has all the surface geometry data of an object. Google SketchUp doesn't export that type natively, but there is an add-on that accomplishes that task. After installing that, I was able to easily export the two models each as STL files.
Another program called Skeinforge is used to create a gcode file that the Makerbot uses to print. Skeinforge runs in Python, and has many variables to customize the print job for your machine. It also can add a raft to the bottom of the object. The raft is a base layer of plastic that the object is printed on for a uniform build surface. It also adds stability in printing as the raft sticks to the build platform.
The gcode generated by Skeinforge is opened in ReplicatorG. This is the actual program that interfaces with the Makerbot. A control panel can be opened in ReplicatorG to control the Makerbot manually. The build platform and extruder can be moved. The extruder can be heated to a particular temperature, and the feed rate of the plastic filament can be run and tested. This is how you warm up the Makerbot to ensure it will print your object properly. You can also see the gcode created and scroll through the many steps that the printer will take to print your object. A simulation of the build can be run, and there's a build button for when you're ready to print an object.
 The two objects printed and I glued them together to form my scale model of the CN Tower. The towers printed better than I expected. The base formed fairly well, and the observation deck looks good. The top tower above the observation deck is very thin, and this formed but with quite a bit of wobbling due to the heat from the extruder being so near it as it built each new small level -- the printed parts never really cooled and didn't form properly. Still, it looks like a small CN Tower.
 I posted the files to Thingiverse in case anyone else wants to try it. There, others can change the files to suit their needs, or make changes to try make a better print. It's been downloaded a number of times, but I don't know if anyone else has tried printing it. A couple of users liked it, though.
User generated repositories of 3D models are great resources for fabrication. Many models are out there at sites like Thingiverse or Google's 3D Warehouse. What types of things can humanities scholars contribute to these sites? Making data available can allow others to experiment with their models, and play with physical objects related to their research.
As cultural and heritage institutions have directed resources toward the digitization of their collections, perhaps we can try to re-materialize elements of those collections locally for applied research and study. Digitization has often been in the form of digital photographs of objects, but 3D scanning technologies and virtual modeling software has become much more accessible. Hopefully digitization in museums, for instance, will move toward three dimensional digitization, as those forms will inherently record more physical information about objects. Open access to that data would allow researchers to experiment with those forms in a variety of ways, both in virtual and re-materialized physical forms.
The Google 3D Warehouse is a publicly accessible repository of models generated by users of Google's 3D modeling software, SketchUp. The finest of these models have been added to Google Earth, where you can go 'see' those buildings virtually on the globe. The Google 3D Warehouse is therefore a source of many digital models of buildings. The contents are not limited to existing buildings, though, as users have also contributed all kinds of models, ranging from historic buildings that no longer exist to entirely fictional creations like sci-fi spaceships and weapons from Middle Earth. Pretty much anything can be modeled in Google SketchUp and then stored at the Google 3D Warehouse.
To explore the capabilities of the Makerbot, I decided to try to print a scaled-down model of the CN Tower. It would be an example of going from Google SketchUp model to a physical model, and the tower design would demonstrate the Makerbot's ability to print a tall, thin tower. I found a model with a search on Google's 3D Warehouse, and opened it in SketchUp.
It was designed according to the actual dimensions of the CN Tower, but another benefit of digital models is that they are easily scalable and the proportions can be kept constrained. SketchUp features a scale tool for easily altering the size of a model. I couldn't get Google SketchUp to go straight from CN Tower-size to Makerbot-size, but I got there in multiple steps of scaling the model. Eventually, I got it down to around 11cm in height. I cut the model into two parts, each of which would fit in the build space of the Makerbot.
To print on a Makerbot, a model has to go through a few steps to create the code that the printer will use to make the object. The file must be in .STL (stereolithography) format. That file type has all the surface geometry data of an object. Google SketchUp doesn't export that type natively, but there is an add-on that accomplishes that task. After installing that, I was able to easily export the two models each as STL files.
Another program called Skeinforge is used to create a gcode file that the Makerbot uses to print. Skeinforge runs in Python, and has many variables to customize the print job for your machine. It also can add a raft to the bottom of the object. The raft is a base layer of plastic that the object is printed on for a uniform build surface. It also adds stability in printing as the raft sticks to the build platform.
The gcode generated by Skeinforge is opened in ReplicatorG. This is the actual program that interfaces with the Makerbot. A control panel can be opened in ReplicatorG to control the Makerbot manually. The build platform and extruder can be moved. The extruder can be heated to a particular temperature, and the feed rate of the plastic filament can be run and tested. This is how you warm up the Makerbot to ensure it will print your object properly. You can also see the gcode created and scroll through the many steps that the printer will take to print your object. A simulation of the build can be run, and there's a build button for when you're ready to print an object.
 The two objects printed and I glued them together to form my scale model of the CN Tower. The towers printed better than I expected. The base formed fairly well, and the observation deck looks good. The top tower above the observation deck is very thin, and this formed but with quite a bit of wobbling due to the heat from the extruder being so near it as it built each new small level -- the printed parts never really cooled and didn't form properly. Still, it looks like a small CN Tower.
 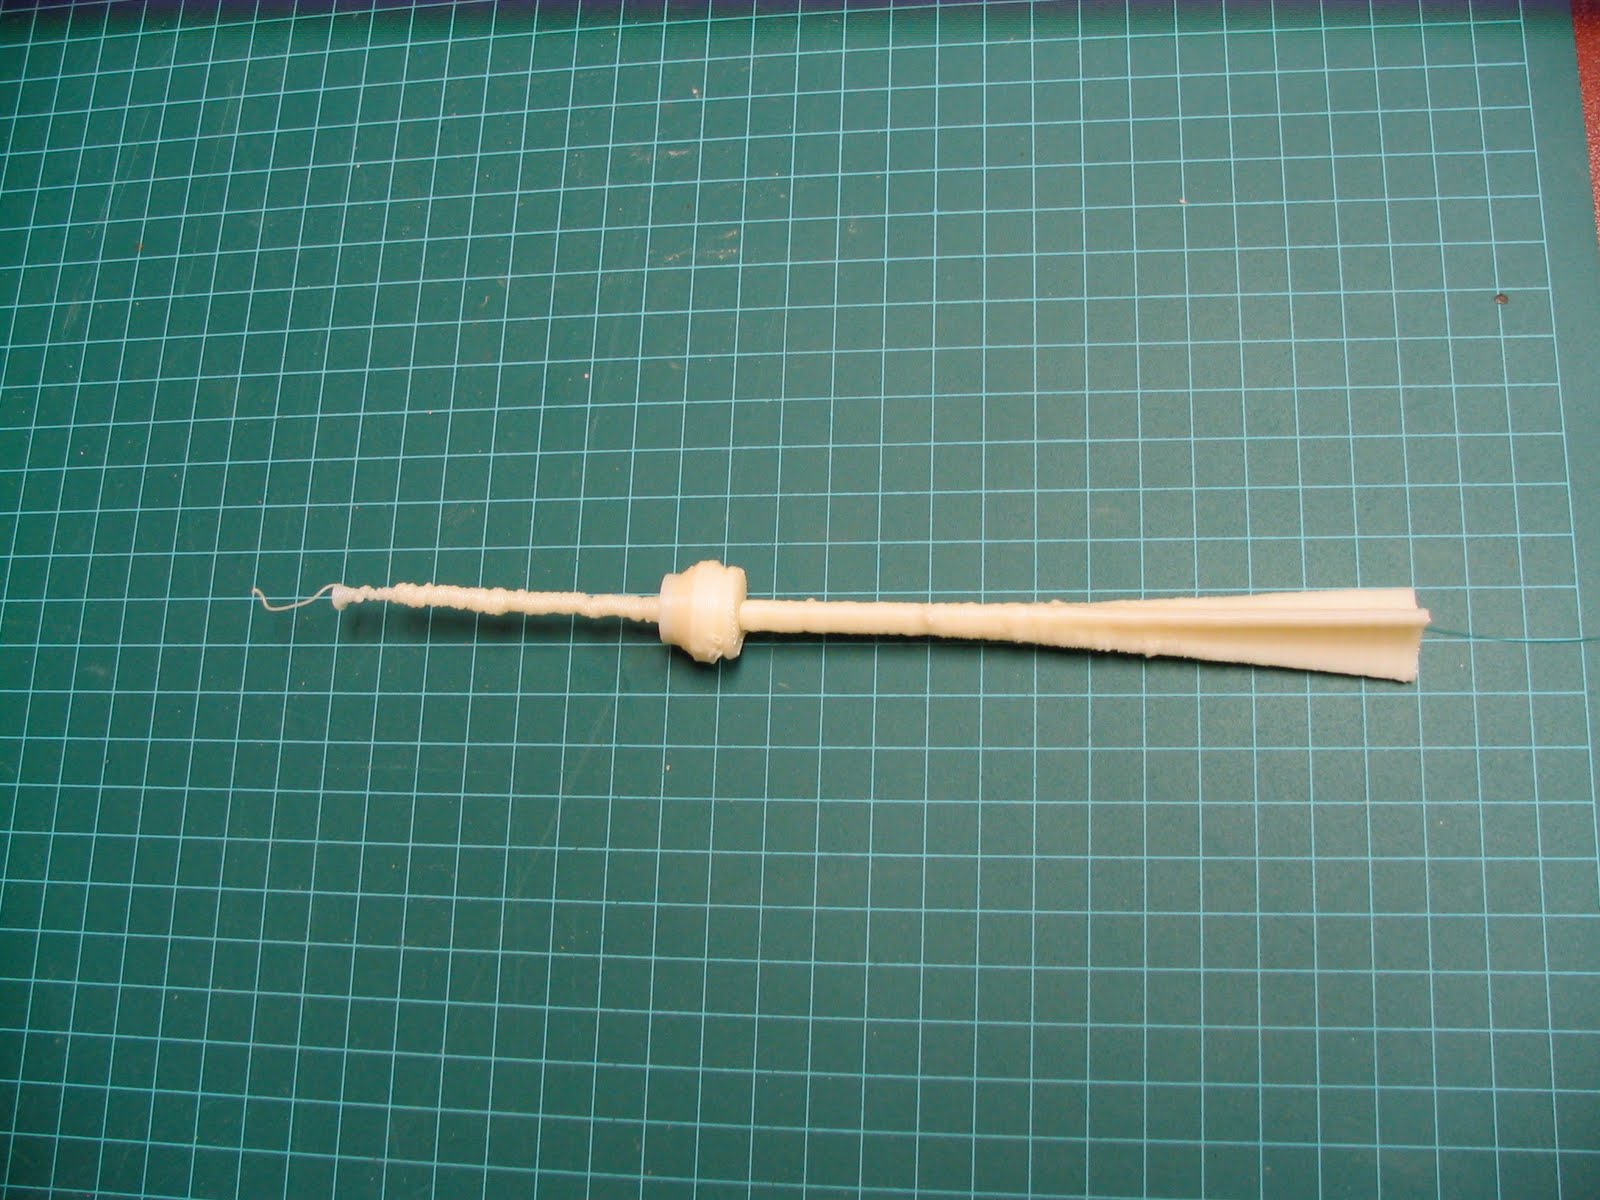 I posted the files to Thingiverse in case anyone else wants to try it. There, others can change the files to suit their needs, or make changes to try make a better print. It's been downloaded a number of times, but I don't know if anyone else has tried printing it. A couple of users liked it, though.
User generated repositories of 3D models are great resources for fabrication. Many models are out there at sites like Thingiverse or Google's 3D Warehouse. What types of things can humanities scholars contribute to these sites? Making data available can allow others to experiment with their models, and play with physical objects related to their research.
As cultural and heritage institutions have directed resources toward the digitization of their collections, perhaps we can try to re-materialize elements of those collections locally for applied research and study. Digitization has often been in the form of digital photographs of objects, but 3D scanning technologies and virtual modeling software has become much more accessible. Hopefully digitization in museums, for instance, will move toward three dimensional digitization, as those forms will inherently record more physical information about objects. Open access to that data would allow researchers to experiment with those forms in a variety of ways, both in virtual and re-materialized physical forms.
Tuesday, May 18, 2010
Making Makerbots
I’ve been fortunate to work with Bill Turkel at his Lab for Humanistic Fabrication over the past few months. In particular, I’ve been building and using a 3D printer to explore how making things can complement my research. I’m working there over the summer, and will update some of what I have been doing on my blog.
To begin with, here’s the 3D printer I’ve been using. It’s a Makerbot (#363). Fancier commercial 3D printers are available, but are still relatively expensive compared to the Makerbot. The caveat to purchasing a Makerbot, though, is that you have to build it yourself.
That might sound daunting, but the folks at Makerbot Industries have created a well-designed machine, and their wiki provides excellent build instructions. The deluxe kit has everything you need to put one together – materials and tools – and I got the whole thing together in a few days of focused assembly.
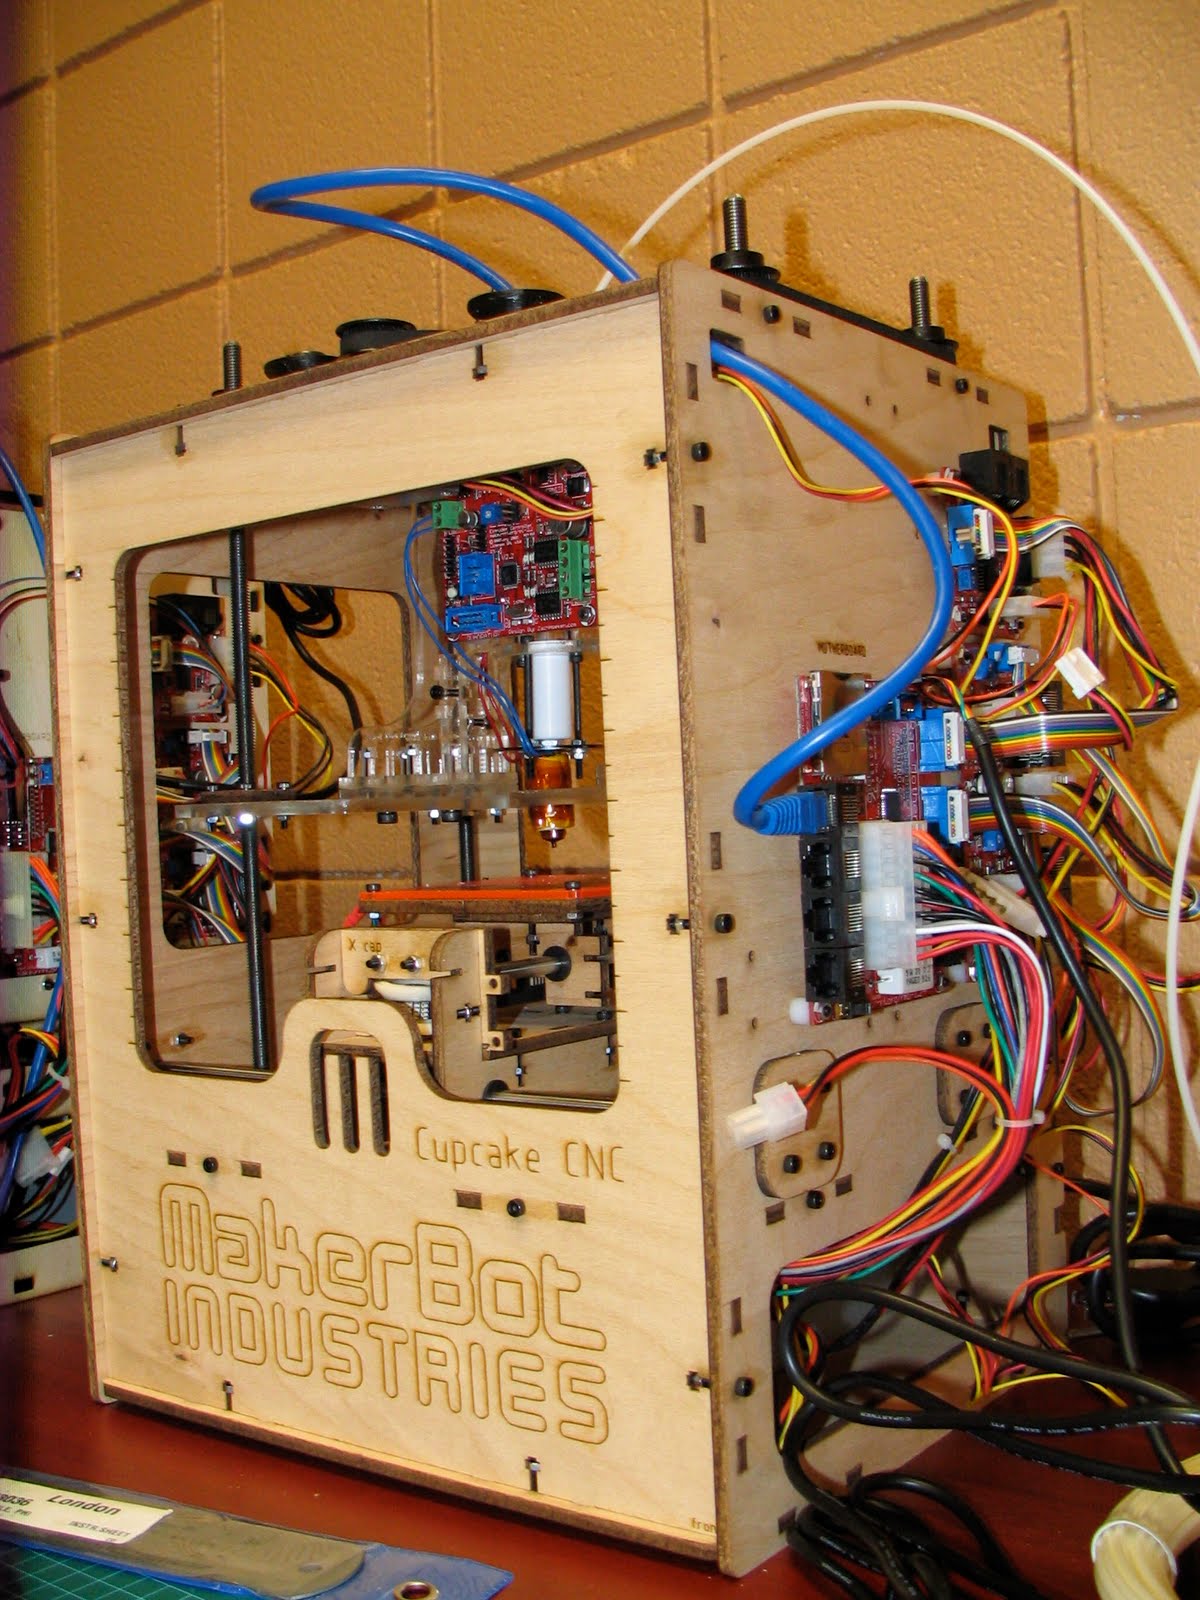
Plastic filament (it’s like a cord of plastic 2-3 mm in diameter) goes into the top of the extruder, a motor controlled by the computer feeds it downward into a tube that is heated under the control of the computer. The tube is heated to the melting point of the plastic, and the feed forces it out a very small nozzle at the end of the extruder. The plastic is piped out in a very thin stream that immediately begins to cool and harden.
The final print is limited in dimensions to roughly 100mm x 100mm x 130mm (4” x 4” x 6”). It is built from the bottom of the platform up, one layer at a time. The size limitations mean that any larger objects will have to be divided into smaller pieces, and those pieces assembled after they are printed.
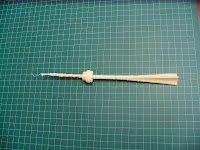
I downloaded the file, warmed up the Makerbot, and hit the build button. It didn’t work right off the bat. I had to adjust the start height a couple of times in order to get the raft to stick to the build platform. A raft is a series of plastic strips printed to use as a uniform base for the object. Once the raft stuck, the piece built up for about half-an-hour until the whistle was finished.
After removing the piece from the build platform, the raft snapped off easily from the whistle. It looked good, with only a bit of plastic trailing on the end that need to be trimmed off. It even whistled!
This initial test confirmed that the printer was working. The functioning whistle added a fun sonic experience to the results. If it can make a 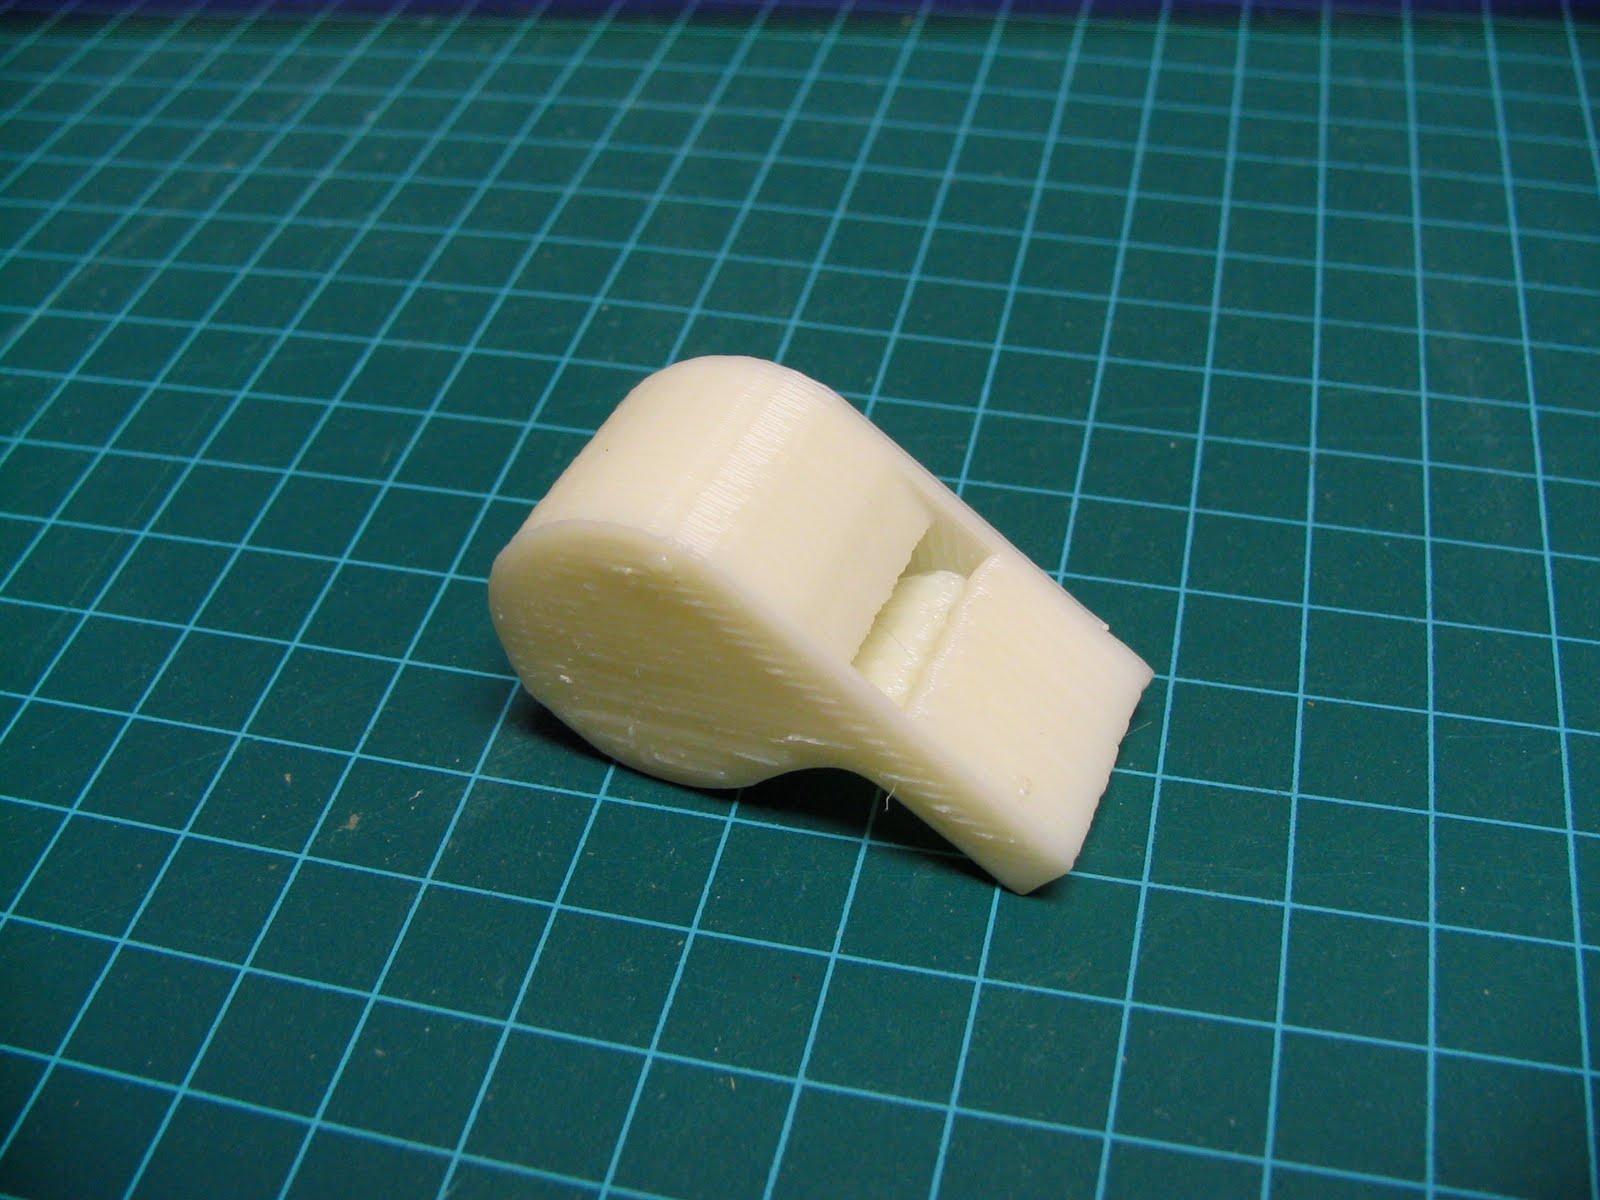 whistle, are there other noise-makers that could be made? Maybe some small instruments, like some old ocharina designs… Or, maybe some pipes in the style of old Wurlitzers or busker organs… When one of my colleagues saw and tried the whistle, she was reminded of a scene from Jurassic Park where a device replicated the sound a dinosaur made. As personal fabrication becomes more accessible, maybe we’ll be able to make devices that attempt to create a sense of sounds of the past.
Monday, September 14, 2009
READING ARTIFACTS: Summer Institute in the Material Culture of Science
I participated in the READING ARTIFACTS workshop at the Canada Science and Technology Museum from August 17 - 21, 2009. There were presentations from a number of scholars who have worked extensively with science artifacts, and we were given the opportunity to apply what we learned over the course of the week using portions of the museum's extensive holdings. The emphasis was on exploring what we can learn from objects themselves, and identifying strategies as a toolkit for that exploration.
From the start, we were confronted with objects removed from their context, yet we quickly discovered ways to learn a lot about those things. Around the room were a variety of artifacts from the museum's collections. We were asked to browse amongst them, and eventually settle upon one that attracted our interest. For the remainder of the week, we were given time to work exclusively upon the artifact -- to learn about it and from it -- so we could present our findings to the rest of the group at the end of the week.
The artifact that stood out most to me was a flimsy, transparent (but yellowed) plastic box that had a simple radio circuit on one side. There was a clockwork mechanism that appeared to perform a variety of unknown functions. The radio drew me to it, and then I kept wondering what all the other parts were doing with the radio -- was it sending something triggered by the mechanical portion? Did it receive a signal to activate the mechanical movements? What sorts of signals could it have been using? If it transmitted, what sort of a signals did it send? If it was a beacon of some kind, where and why was it used?
It turned out that the artifact was likely a radiosonde -- a meteorological measurement device that transmitted the temperature, air pressure, and humidity. It was developed in Russia and is called a Moltchanoff device, named for the inventor. The one we were looking at was likely used in Coppermine, N.W.T., by R. C. Jacobsen, in 1932 for the Second International Polar Year. Arriving at that information turned out to be somewhat complicated, but the process illustrates how useful the material culture perspective can be.
While working with the radiosonde, we examined it for as much detail and information as we could. We developed theories about what it could do and how it functioned. We identified a number of parts to it, and roughly figured out how they worked together. From just examining the object, we were pretty sure it measured temperature, air pressure and humidity, and sent out signals about that information with the radio circuit.
We quickly came to question all of that as we read records about the artifact from the museum. We were looking forward to the records -- we're historians, and we're used to learning about things by reading about it. There was a delay in getting records for our artifact, and when we found some, they turned out to be for a different item in the collection (one that was on display in an exhibit). The two items looked nearly identical, so they were likely the same types of objects. Some of the information about the one on display would probably apply to the one we were looking at, or at least tell us what it did.
According to the records, the one on display was a flashing light meteorograph. That is also a meteorological measurement device, but it flashes a light to be seen on the ground in order to identify the wind direction, speed and height of the device. The exhibit had a photograph of a person flying a kite, and further identified the inventor as John Patterson, head of the Meteorological Service of Canada during the Second International Polar Year. No mention of a radio or Moltchanoff.
This seemed odd. There was no light with either device. Sure, the light might have been damaged or removed, but there was no socket, and the circuit looked like a radio, not something to turn a light on and off. I began to question if the vacuum tube in the radio part maybe was really a light of some sort; or, maybe what I thought was the radio component was some type of oscillating circuit to make a light flash on and off. There was an empty space in the middle of the device -- maybe a light went in there. I began to try to create more and more complicated scenarios in an attempt to make what I was looking match the descriptions I was reading. But the simple explanation was that it was a radio circuit -- to me, it looked like a radio, and a light just didn't make sense.
Further research turned up a third similar device in the museum's collections. It was listed as a 1932 Moltchanoff device, but was just the clockwork part with no case or other circuitry. We went to see it, and found a pristine device, with manufactured parts (like a small circuit board for one of the switches), and red wire with plastic insulation. It was etched with, "1957," which might be a serial number, but based upon the condition and materials of the device, could instead be the year -- it looked more post-WWII than the recorded earlier date of ca. 1932.
We asked around throughout the week, and others thought the circuit looked more like a radio, too, but we found it difficult to say that it was a radio when confronted with all of the written evidence that said it was a flashing light meteorograph. There we were, having spent only a handful of hours with the device, with our interpretation conflicting with reports about what it actually was. The "official" documents all called it a flashing light meteorograph, but the object itself suggested radio.
This was the biggest lesson I experienced through the workshop -- that there is value and authority embodied within the objects themselves, and we can use that for knowledge. At an institution like the Canada Science and Technology Museum, we were confronted with a number of layers of authority regarding the object in question -- it's a museum; a national institution; with years of curatorial oversight and record keeping; and there was a public exhibit displaying elements of that information. Yet the object itself was the main primary source, and it suggested knowledge that was different from the written accounts.
Near the end of the week, we came across an article published by the Smithsonian that credited a drawing of a very similar-looking device to the original Russian article by Moltchanoff. The drawing very accurately depicted the device we had been looking at all week, along with the hookup that the device had to a balloon. It showed that a battery went into the empty space we observed in the device, and made clear that this was a Moltchanoff radiosonde. Finding that credited image finally seemed to confirm what the object itself had been saying all along, but we had been unaccustomed to ascribing that much credit to an object over the authority of texts.
While learning from an object can be problematic -- the object might be removed from its original context; it might have been altered; or, it might have been used in ways not originally intended -- the object itself does hold knowledge that we can learn from. Working with objects should not be neglected by the humanities scholar as they can provide unique insight that might not otherwise be discovered through documentation. An object can tell us much about its past, uses and functions, and through that process, it can also help us learn more about our own research practices and assumptions.
Friday, August 14, 2009
Waiting for an iPhone Time Machine App
Just read this brief article on the Popular Science website about a project in Europe that uses augmented reality to overlay information on actual places. You can read it and see a video here.
Mobile platforms combined with these sorts of technologies offer tremendous potential for relaying information about the past. Here's what I think would make a neat historical iPhone App. I don't know if it's technologically possible, but given that I can play Myst on my iPod Touch, something similar should be possible with an iPhone.
Reconstruct a virtual place, say a downtown street of a city from a specific time in the past. Photographs could provide information of what the buildings looked like. Old city plans and fire records can provide dimensions and locations on the street. The digitally rendered place should be done to scale.
From what I know of virtual landscapes, a virtual camera is positioned within that digital place to provide a viewpoint. It's location and orientation is used to calculate the view provided.
Correlate that virtual place with the real street. Use GPS data and the digital compass to provide orientation. That data is used to position the virtual camera within the digital landscape.
As one moves down the street and points their mobile device, the GPS and digital compass information changes, altering the view of the virtual world displayed on the screen.
As one moves through their actual location, they can then approximate movement through a historical space by using the view on their device as a portal to that location in the past. This would hopefully have a dramatic effect on one's experience of place and history.
If it were a city street, the user would get an approximation of the proximity of storefronts or houses, along with their look and design. If more information was available about a particular location, perhaps other controls could be added to virtually enter that location and look around. A game could be constructed to provide a narrative goal and directions for moving through the real and virtual space. I think there's a lot of potential here for tourism and historic places.
If any iPhone App developers need a historian for a project like this, my email is on the screen.
Friday, June 19, 2009
History Kits
I recently read an article by Rich Mitchell from the November 2007 issue of QST, the magazine of the American Radio Relay League (ARRL). Titled Building Kits to Learn, Mitchell explains the modular construction of a small radio transceiver kit known as the Pixie 2. He uses this as an example of the knowledge one can learn from assembling kits. It's not just a matter of putting pieces together -- you can use a kit as a platform to better understand a topic.
I've assembled a few simple electronics kits, and Mitchell's article has inspired me to attempt to construct the Pixie 2 in the manner he describes. He makes a strong case for each of the four stages as providing one with a better understanding of the building blocks of radio fundamentals. In particular, he mentions that this approach is similar to an old radio servicing approach used in testing the stages of radios.
Constructing a kit in this manner includes an attitude about the elments that comprise a radio device, and the components necessary for its proper functioning. I wonder if a similar approach could be used in learning about historic topics. In technological histories, building a device might inform one with a perspective of assembly and the elements of its functioning that a review of the literature on the subject might not address. Using the device, in addition to a sense of satisfaction, might reveal experiential contingencies that weren't apparent in a schematic or theory.
With radio, as in this case, a builder gains experience and understanding of how each stage of the tranceiver functions, and gets the reward of hearing and sending signals from the proper construction and alignment of those elements.
Could a History Kit be put together to help teach a particular topic? What would it include? Could it be made dynamic yet modular so as to incorporate elements of complexity that historians like to analyze; or, would such an approach only apply to seemingly linear topics?
Thursday, June 18, 2009
Hacking as a Way of Knowing
In May, I participated in the Hacking as a Way of Knowing workshop hosted by Bill Turkel and Edward Jones-Imhotep. It was a great weekend of hands-on collaborative work that resulted in some really interesting projects.
I spent most of my time there making a scanner camera similar to one I had read about in Make magazine. The results can be seen in the Projects section of the website that has been posted at NiCHE. There's a picture of the camera and a number of photos taken with it at the workshop, as well as a small video about it.
The website has lots of information about the workshop, including reflections by some of the participants (including myself) on their experiences. I'm looking forward to applying things I learned from the workshop to my research work. For instance, my research on stage magic has shown that simply understanding the method or secret to an illusion does not convey everything about it. Experiencing a performance of magic involves an embodiment of intrinsic knowledge particular to the magician, the assistants, and the audience members that might be lost in translation if it is only read about. I have some ideas on how to experiment with this, and will post the projects here on the blog.
Subscribe to:
Posts (Atom)